How to Use Z-GRC
This guide walks you through the complete setup process for integrating Z-GRC into your applications, from initial SSR configuration to implementation.
Overview
Z-GRC can be integrated in three ways depending on your use case:
- For AWS Bedrock Model Calls - Python SDK integration for AWS Bedrock LLM access
- For OpenAI Model Calls - Python SDK integration for OpenAI, Azure OpenAI, Databricks, and OpenAI-compatible endpoints
- For Claude Code - Proxy based integration for CLI applications
All methods share a common prerequisite: SSR Application Setup.
Prerequisite: SSR Application Setup
Before using Z-GRC in any capacity, you must configure the SSR (Server-Side Rendering) application to manage governance policies and budgets.
Step 1: Host the SSR Application
Deploy the SSR application in your infrastructure. This application serves as the central control plane for managing LLM governance policies, user groups, and budget allocations.
See the Z-GRC Application documentation for deployment deployment steps.
Deployment Options
The SSR application can be hosted on-premises or in your cloud environment, depending on your security and compliance requirements.
Step 2: Create a User Group
Once the SSR application is running, create a user group to organize and manage your LLM consumers:
- Navigate to the SSR application dashboard
- Go to User Groups section
- Click Create New User Group
- Provide the following details:
- Group Name: A descriptive name for your group (e.g., "Development Team", "Production Apps")
- Description: Optional description of the group's purpose
- Members: Add users or applications to this group
- Allocate Budget Cost - Set spending limits and quota allocations for the user group
Budget Enforcement
Once the allocated quota is exceeded, Z-GRC will automatically block further LLM requests until the quota resets or is manually increased.
Step 3: Generate API Key
After configuring the user group and budget:
- In the dashboard, click Generate API Key
- Copy and securely store the generated API key
- The API key format will be:
zgrc_xxxxxxxxxxxxxxxxxx
Security Best Practice
- Never commit API keys to version control
- Store keys in environment variables or secure secret management systems
1. For AWS Bedrock Model Calls
Use this method when you want to integrate Z-GRC into your Python applications that make programmatic calls to AWS Bedrock models.
Framework Compatibility
Z-GRC seamlessly integrates with popular LLM frameworks and libraries including PydanticAI, LangChain, Strands Agents, and other AWS Bedrock-compatible frameworks. Simply initialize Z-GRC before using these frameworks, and governance will be automatically applied to all LLM interactions.
Step 1: Install Z-GRC Python Package
Install the Z-GRC package using your preferred Python package manager:
For applications requiring comprehensive observability, install with auto-instrumentation support:
Step 2: Initialize Z-GRC in Your Code
Import and initialize Z-GRC at the entry point of your application:
Step 3: Use AWS Bedrock SDKs Normally
After initialization, use your AWS Bedrock SDKs as you normally would. Z-GRC automatically intercepts and governs all LLM interactions.
Click on any example below to expand and view the code:
Example 1: AWS Bedrock - Basic Usage
Use AWS Bedrock normally after initialization:
import zgrc
import boto3
import json

# Initialize Z-GRC
zgrc.init(api_key="zgrc_your_api_key_here")

# Use AWS Bedrock normally
client = boto3.client("bedrock-runtime", region_name="us-east-1")

response = client.invoke_model(
    modelId="us.anthropic.claude-sonnet-4-5-20250929-v1:0",
    body=json.dumps({
        "anthropic_version": "bedrock-2023-05-31",
        "max_tokens": 1024,
        "messages": [
            {"role": "user", "content": "Explain quantum computing in simple terms"}
        ]
    })
)

result = json.loads(response["body"].read())
print(result["content"][0]["text"])
Example 2: AWS Bedrock - Streaming Responses
Z-GRC fully supports streaming responses with automatic token tracking:
import zgrc
import boto3

zgrc.init(api_key="zgrc_your_api_key_here")

client = boto3.client("bedrock-runtime", region_name="us-east-1")

response = client.converse_stream(
    modelId="us.anthropic.claude-sonnet-4-5-20250929-v1:0",
    messages=[
        {
            "role": "user",
            "content": [{"text": "Write a short story about AI"}]
        }
    ]
)

# Stream the response
for event in response["stream"]:
    if "contentBlockDelta" in event:
        text = event["contentBlockDelta"]["delta"]["text"]
        print(text, end="", flush=True)
Example 3: Environment-Based Configuration
For better security and flexibility, use environment variables:
import os
import zgrc

zgrc.init(
    api_key=os.getenv("ZGRC_API_KEY"),
    app_name="my-application",
    environment="production"
)
Set the environment variable:
Example 4: Auto-Instrumentation (Advanced)
Enable comprehensive observability for your entire application stack:
import zgrc
import logging

zgrc.init(
    api_key="zgrc_your_api_key_here",
    auto_instrument=True,        # Enable auto-instrumentation
    app_name="my-llm-app",        # Application identifier
    environment="production",     # Environment name
)
Auto-instrumentation provides:
- HTTP client/server tracing
- Database query monitoring
- Framework-specific instrumentation
- Distributed tracing across services
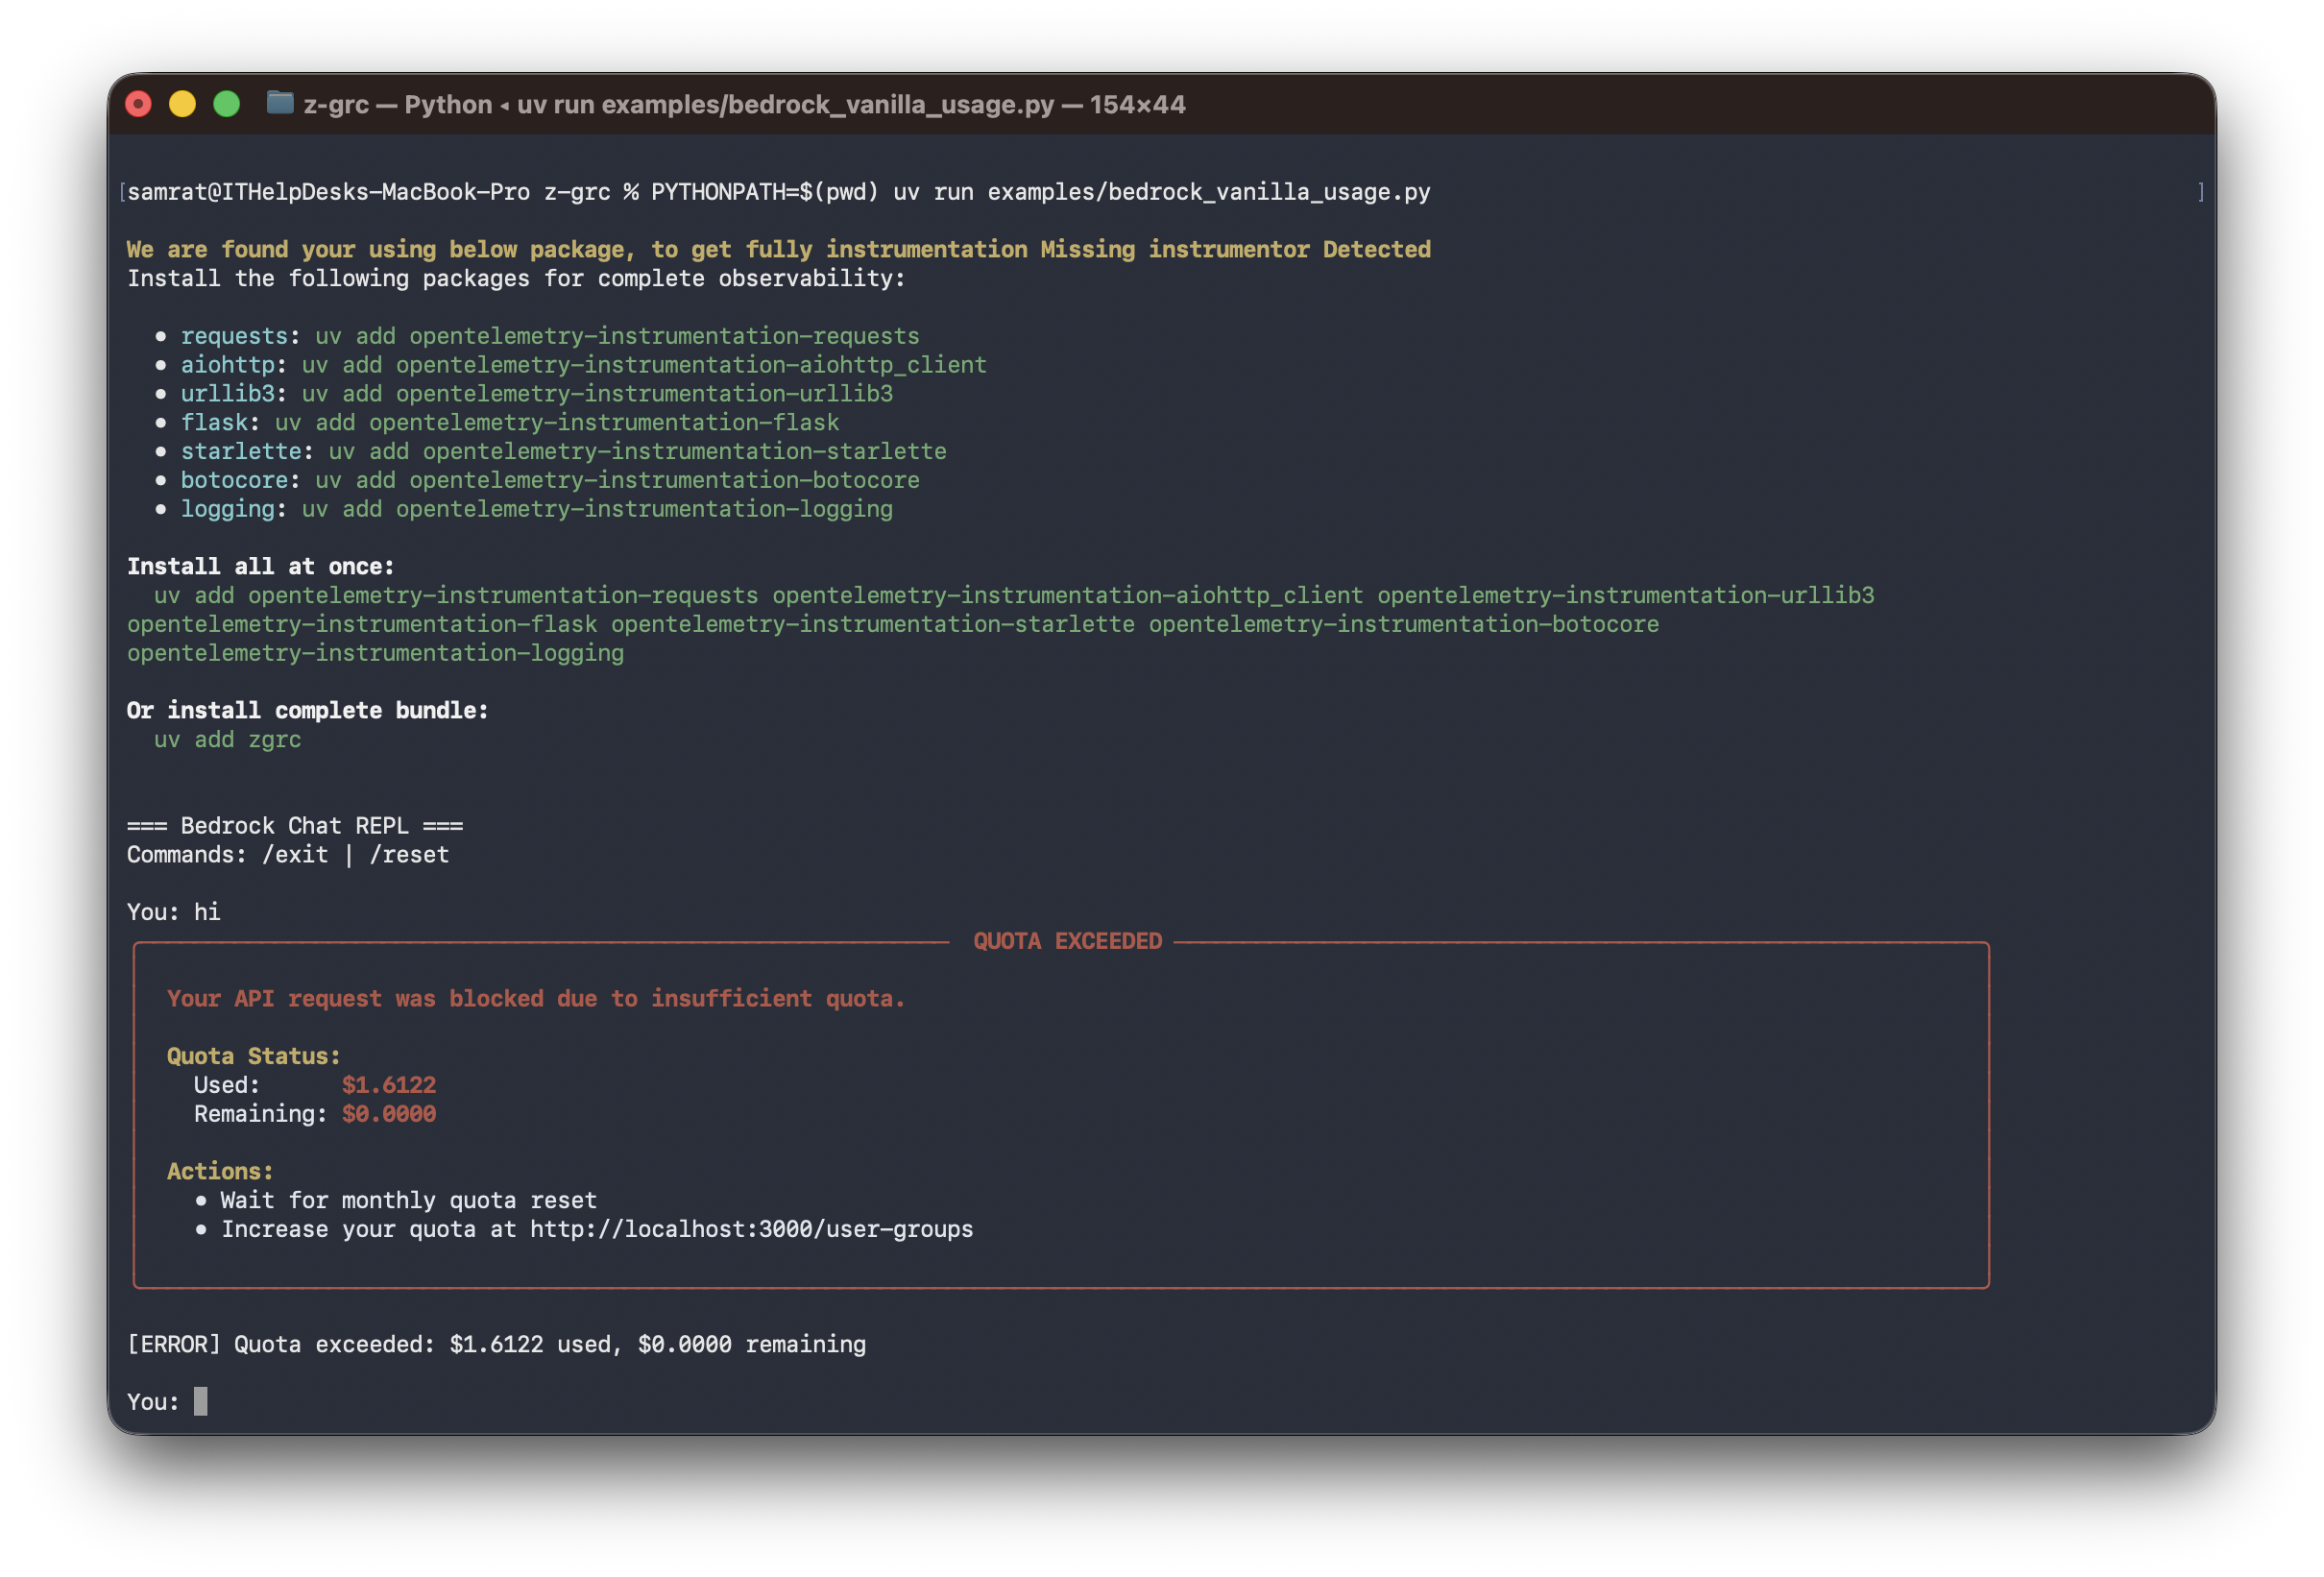
Example 5: Handling Quota Exceeded Errors
Implement graceful error handling for quota violations:
import zgrc
from zgrc.utils import QuotaExceededException
import boto3
import json

zgrc.init(api_key="zgrc_your_api_key_here")

client = boto3.client("bedrock-runtime", region_name="us-east-1")

try:
    response = client.invoke_model(
        modelId="us.anthropic.claude-sonnet-4-5-20250929-v1:0",
        body=json.dumps({
            "anthropic_version": "bedrock-2023-05-31",
            "max_tokens": 1024,
            "messages": [{"role": "user", "content": "Hello!"}]
        })
    )
except QuotaExceededException as e:
    print(f"❌ Quota exceeded: ${e.used:.4f} used, ${e.remaining:.4f} remaining")
    print(f"Please contact your administrator to increase the quota")
    # Implement fallback logic or notify administrators
except Exception as e:
    print(f"❌ Error: {str(e)}")
2. For OpenAI Model Calls
Use this method for OpenAI, Azure OpenAI, Databricks, or any OpenAI-compatible endpoint.
Installation & Setup
import zgrc
from openai import OpenAI

# Initialize Z-GRC
zgrc.init(api_key="zgrc_your_api_key_here")

# Use OpenAI normally - works with OpenAI, Azure, Databricks
client = OpenAI(api_key="your-openai-key")

response = client.chat.completions.create(
    model="gpt-4",
    messages=[{"role": "user", "content": "Hello!"}]
)
Wide Compatibility
Works with OpenAI, Azure OpenAI, Databricks Model Serving, and any OpenAI-compatible API.
Cost Tracking Requirement
Z-GRC uses litellm for cost calculation. Unsupported models will fail with a professional error message - this is intentional for accurate governance.
Key Features
- Automatic token & cost tracking via litellm
- Streaming support with real-time tracking
- Fail-fast error handling for critical failures
- Verbose logging - set
verbose=Trueinzgrc.init()for debug logs
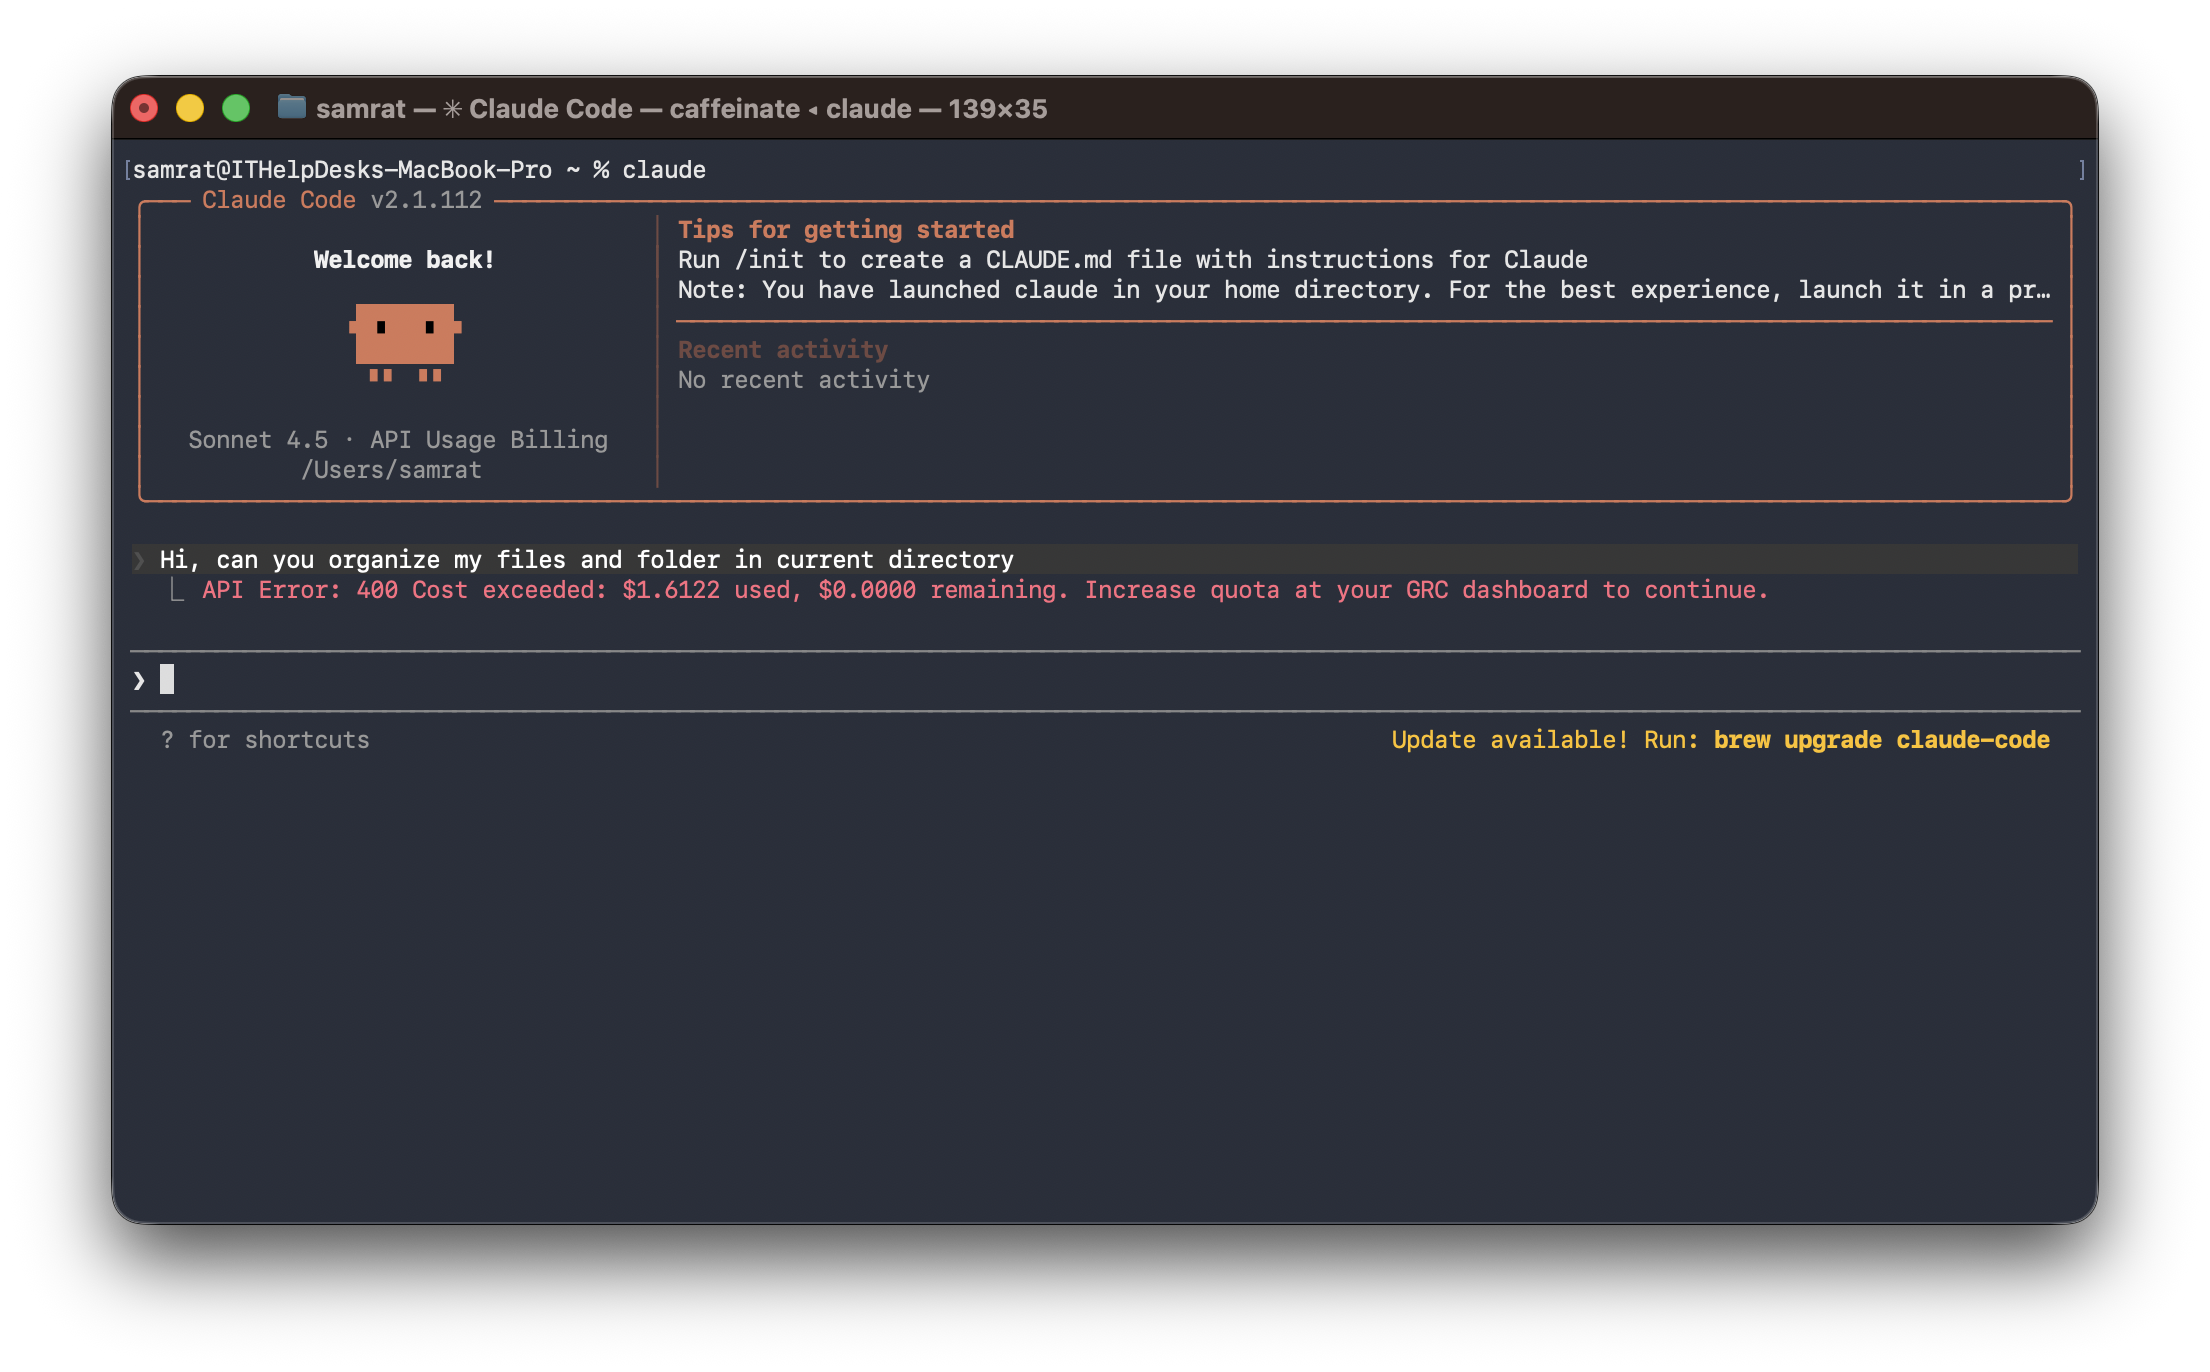
3. For Claude Code
Use this method when you want to govern Claude Code CLI sessions through a proxy-based approach.
Overview
The Z-GRC proxy acts as an HTTP interceptor that monitors and governs all API calls made by Claude Code. This method requires running a proxy server and launching Claude Code with specific environment variables.
Step 1: Install Z-GRC Proxy
Install the Z-GRC proxy executable on your system:
Alternatively, you can build the executable from source:
Step 2: Start the Z-GRC Proxy
Z-GRC proxy can run in two modes: background (recommended) or foreground.
Option A: Background Mode (Recommended)
Launch proxy in background and automatically set environment variables, then run Claude Code in the same terminal:
Claude Code running with Z-GRC proxy in background mode
Important: Terminal Session Scope
The environment variables are set only for the current terminal session. You need to run the eval $(z-grc-proxy ...) command in every new terminal where you want to use Claude Code with Z-GRC.
Option B: Foreground Mode
Terminal 1 - Start the proxy (shows logs, blocks terminal):
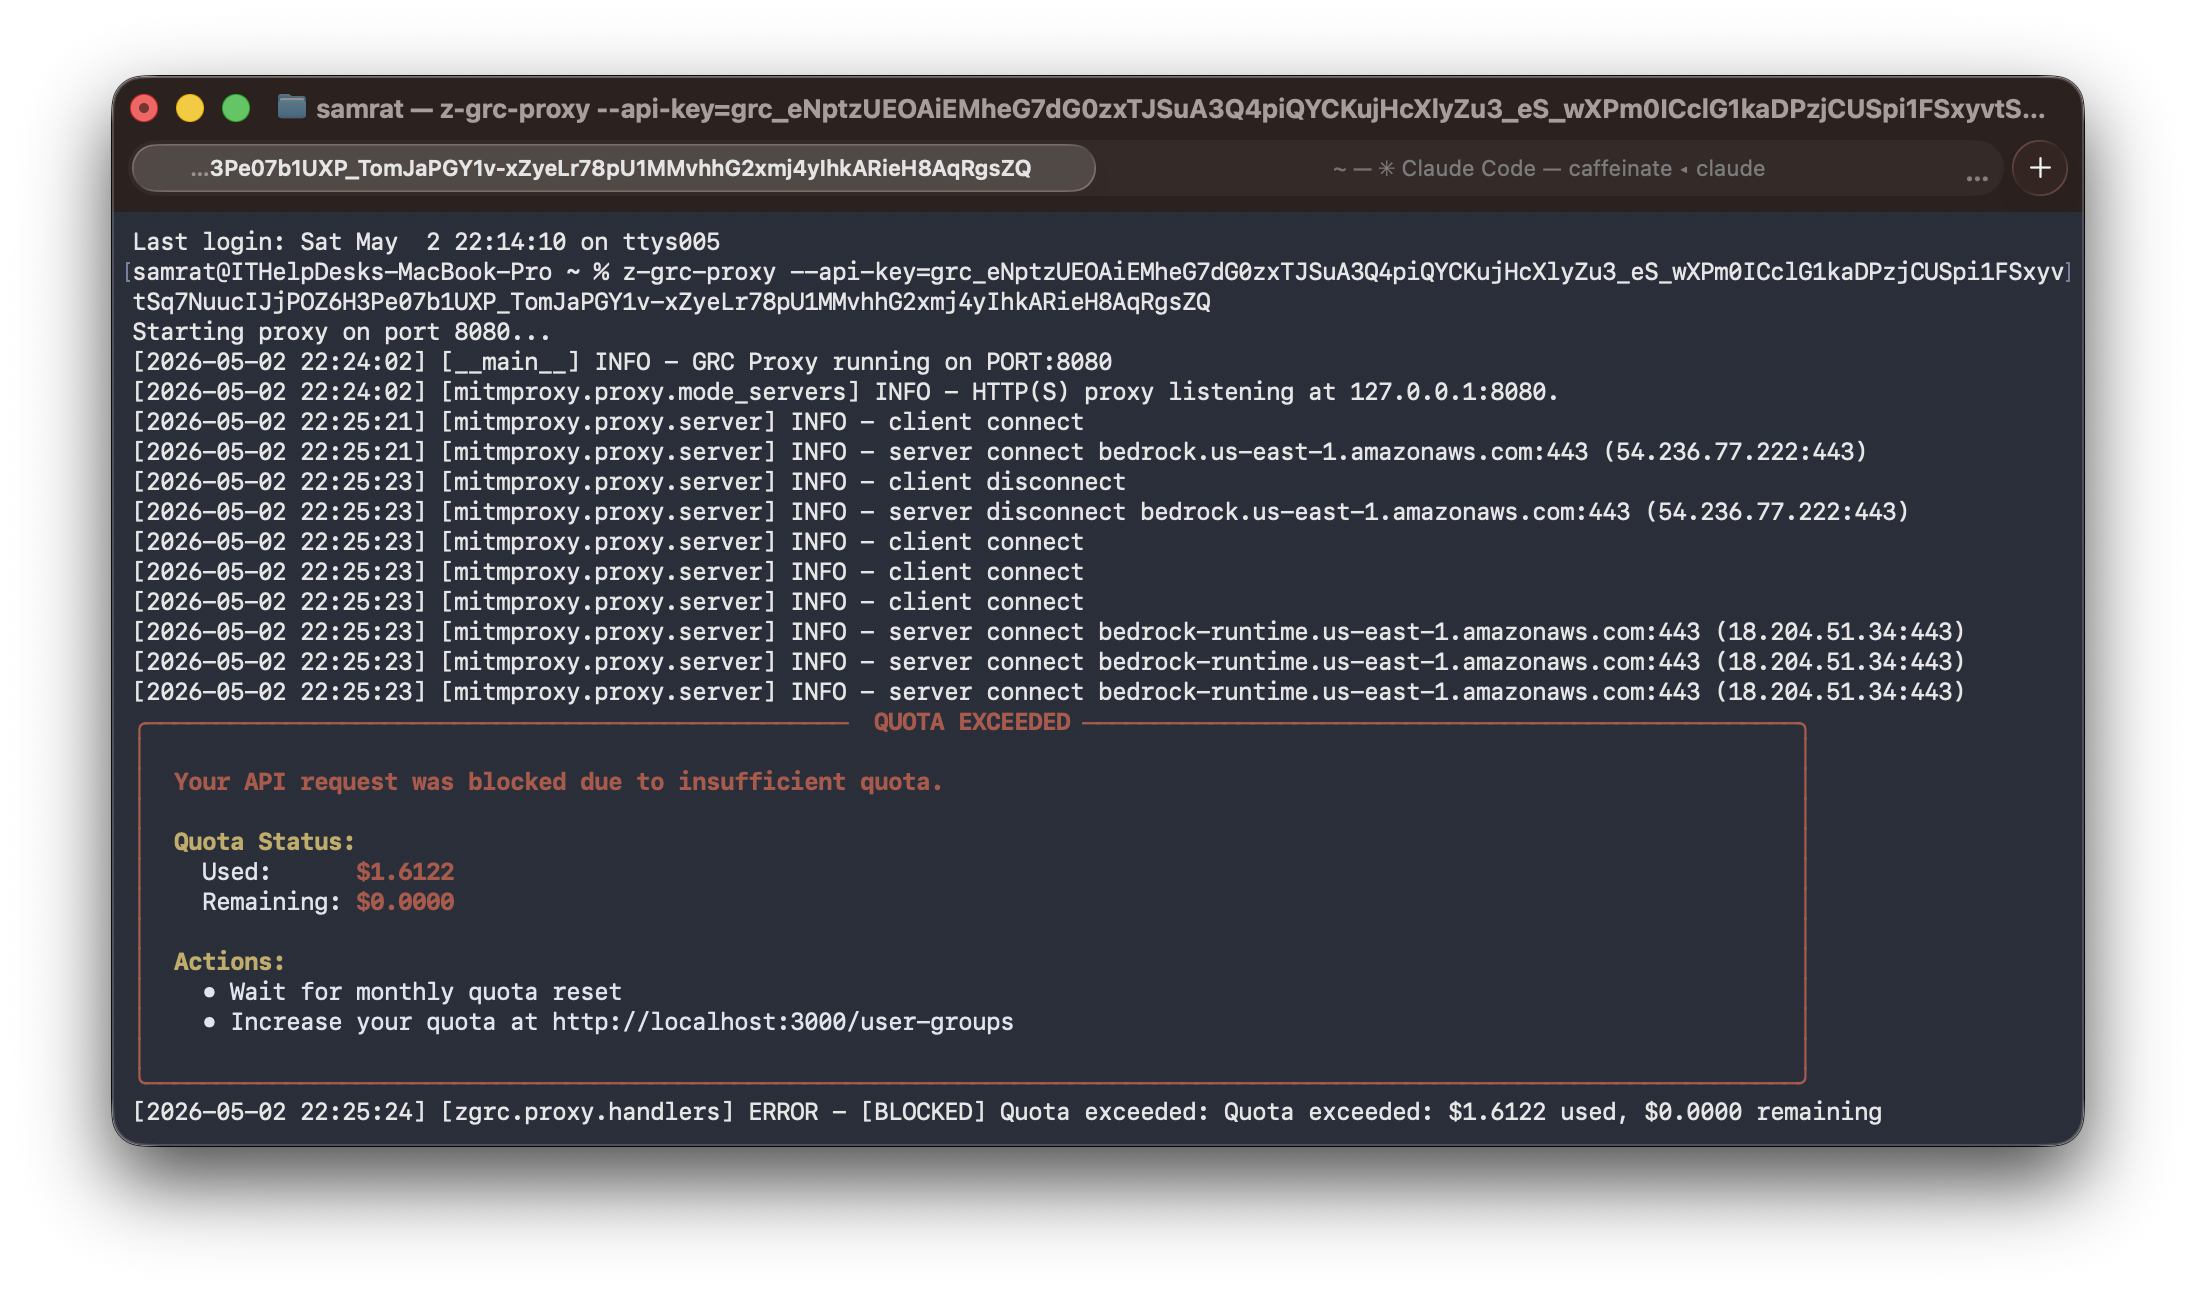
Proxy server running in foreground with request logs
Terminal 2 - Open another tab, set environment variables (HTTP proxy and certificate), then run Claude:
How Foreground Mode Works
- Terminal 1: Proxy runs in foreground and shows live request/response logs
- Terminal 2: Claude Code runs with environment variables that route traffic through the proxy (HTTP proxy + SSL certificate)
Proxy Management Commands
# Check active proxy sessions
z-grc-proxy --status

# Kill all running proxy servers
z-grc-proxy --kill-all

# Run on specific port
z-grc-proxy --api-key=your-key --port=8085 -d | Out-String | Invoke-Expression

# Enable verbose logging
z-grc-proxy --api-key=your-key -d --verbose | Out-String | Invoke-Expression
Smart Session Management
- Auto Port Detection: Finds available port (8080-8090)
- Session Reuse: Running with same API key reuses existing proxy
- Certificate Auto-Generation: SSL certs created in
~/.mitmproxy/on first run - Platform Independent: Works on Linux, macOS, Windows
Step 3: Verify Proxy is Running
Check that the proxy is active:
Expected output:
Troubleshooting
Common Issues
API Key Invalid
Error: Invalid API key provided
Solution:
- Verify the API key is correctly copied from SSR
- Ensure no extra spaces or characters
- Check that the user group associated with the key is active
Requests Not Being Tracked (Python SDK)
Error: LLM requests succeed but don't appear in SSR dashboard
Solution:
- Verify
zgrc.init()is called before any LLM SDK imports or usage - Check network connectivity between your application and SSR
- Review firewall rules
Certificate Error (Claude Code)
Error: SSL certificate verification failed
Solution:
- Ensure the proxy has been run at least once to generate certificates
- Verify
NODE_EXTRA_CA_CERTSpoints to the correct certificate path - Check that
~/.mitmproxy/mitmproxy-ca.pemexists
Proxy Not Intercepting Requests
Error: Claude Code works but requests aren't being intercepted
Solution:
- Verify
HTTPS_PROXYenvironment variable is set correctly - Ensure the proxy is running before launching Claude Code
- Check that Claude Code is using the correct network settings
Import Error (Python SDK)
Error: ModuleNotFoundError: No module named 'zgrc'
Solution:
- Reinstall Z-GRC:
uv add z-grcorpip install z-grc - Verify you're using Python 3.10 or higher
- Check that you're using the correct Python environment
For additional support, visit our GitHub repository or contact zeb Labs.